You see LED Displays in many places, but do you know how factories make these screens? The process begins by making LED chips from special materials like gallium nitride. Workers put these chips on circuit boards. They set the pixel pitch to help the image look clear. Then, they join modules together to make panels. Technicians use special tools to adjust color and brightness. Every screen is tested for quality. Only the best screens are packed and sent to you.
Each step uses advanced tools and careful checks. This makes sure your LED Display works well anywhere.
LED displays begin with special materials like gallium and sapphire. These make tiny LED chips that shine bright and last a long time. Factories build circuit boards with care. They control heat and moisture to keep parts working well. This helps stop problems and defects. Machines put small parts in place fast and with accuracy. People also help with new designs and fixing mistakes. Modules with LEDs and driver chips go into frames. Then, they get connected and set up to show clear, bright pictures. Quality checks and protective coatings help the screens work well. They last for years and stay safe inside or outside.
To build an LED Display, you need the right materials. The most important ones are special semiconductor compounds. These are gallium arsenide, gallium phosphide, and gallium arsenide phosphide. You also need metals like gallium and indium. These metals are rare and hard to get, so factories handle them carefully. To make the chips, workers mix gallium, arsenic, and phosphor in a chamber. This makes crystal ingots. Workers cut these ingots into thin wafers.
You must do the doping process. In this step, you add a little zinc, nitrogen, silicon, germanium, or tellurium. Doping changes how the chip moves electricity. This is needed to make the chip light up. The substrate, usually made from sapphire, holds the chip. Sapphire is good because it stays strong when hot and does not break down.
Note: Gallium is the most important material for LED chips. Indium and indium tin oxide help make displays bright and clear.
Before using these materials, you must check their quality. Sapphire substrates need to be at least 99.99% pure alumina. This high purity makes the substrate strong and helps it last longer. Factories clean alumina powder, grow it into single-crystal sapphire ingots, then cut and polish it.
You also check if the crystal structure of the substrate matches the chip. This helps stop cracks and defects. The substrate and chip must expand the same way when heated. If not, the chip can break. The substrate should resist chemicals and heat. Sapphire is a top pick because it does all this, even though it is hard to work with.
When checking LED chips, you look for good color, low heat, and steady brightness. Only the best chips and substrates go to the next step in making an LED Display.
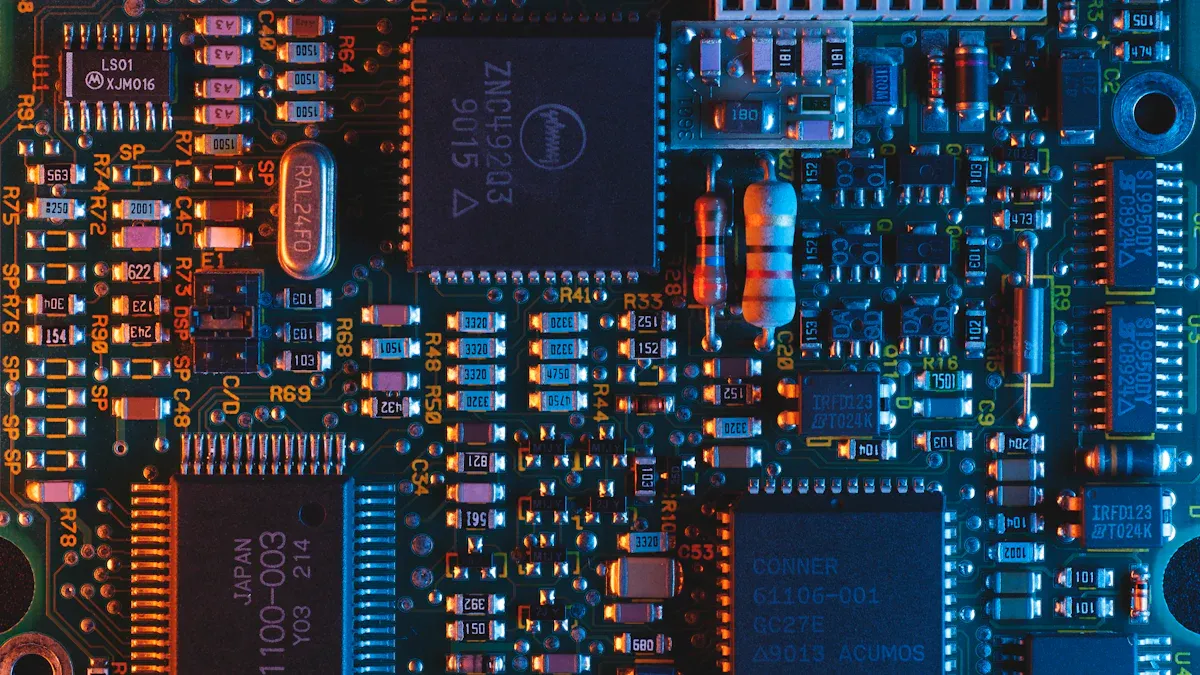
You start by choosing the right base material for your circuit board. For high-power screens, you often use aluminum-based PCBs because they move heat away from the components quickly. If you need a flexible board, you might pick polyimide or FR4. Some boards use copper for even better heat transfer, but these cost more.
You build the board layer by layer. First, you etch copper circuits onto the base. This creates the paths for electricity. Next, you add a solder mask, usually white, to reflect light and protect the copper. You print the design using a stencil, then use pick-and-place machines to set tiny parts like driver ICs and resistors on the board. After that, you run the board through a reflow oven. The heat melts the solder paste and locks the parts in place.
Tip: Good thermal management keeps your board cool and helps it last longer. You can use heat sinks, thermal vias, or thicker copper layers to move heat away from sensitive parts.
Moisture can ruin your circuit board. Before you add solder paste, you must dry the board and all parts. You use dehumidifiers and heaters to keep the air dry. If the air is too wet, the solder paste absorbs water. This causes problems like solder balls, cracks, or even broken parts. If the air is too dry, the paste dries out and does not stick well.
Here’s a quick look at how humidity affects your process:
Humidity Condition | Impact on Solder Paste and Circuit Board Quality |
High Humidity | Solder paste absorbs moisture, causing defects and damage. |
Low Humidity | Paste dries out, leading to poor solder joints. |
Optimal Humidity | Keeps paste smooth and prevents oxidation. |
You should keep the room at about 25°C and 55-75% humidity. After you print the solder paste, move the board to the oven within 30 minutes. This step stops the paste from picking up moisture and keeps your board strong.
Note: Careful control of temperature and humidity helps you avoid costly mistakes and ensures your circuit board works perfectly.
You begin by putting small parts on the circuit board. There are two ways to do this: by hand or with machines. Each way has good and bad points. The table below shows how they compare:
Factor | Manual Component Placement | Automated Component Placement |
Costs | Cheaper to start but costs more for workers | Costs more at first for machines and setup |
Speed | Slow and takes a lot of time | Very fast and can run without people |
Flexibility/Changeover | Easy to change designs without new programming | Needs new programming for any design changes |
Labor Requirements | Needs skilled workers for careful hand work | Fewer workers needed; skilled people run the machines |
Quality | Mistakes can happen because people make errors | Machines are very accurate and make fewer mistakes |
Volume Suitability | Best for small batches or testing new ideas | Best for making lots of screens at once |
Process Control | People can spot small problems by looking closely | Machines use cameras and programs to check for problems |
Fault Recovery | Easy to fix single parts by hand | Harder to fix; may need to reprogram or fix by hand |
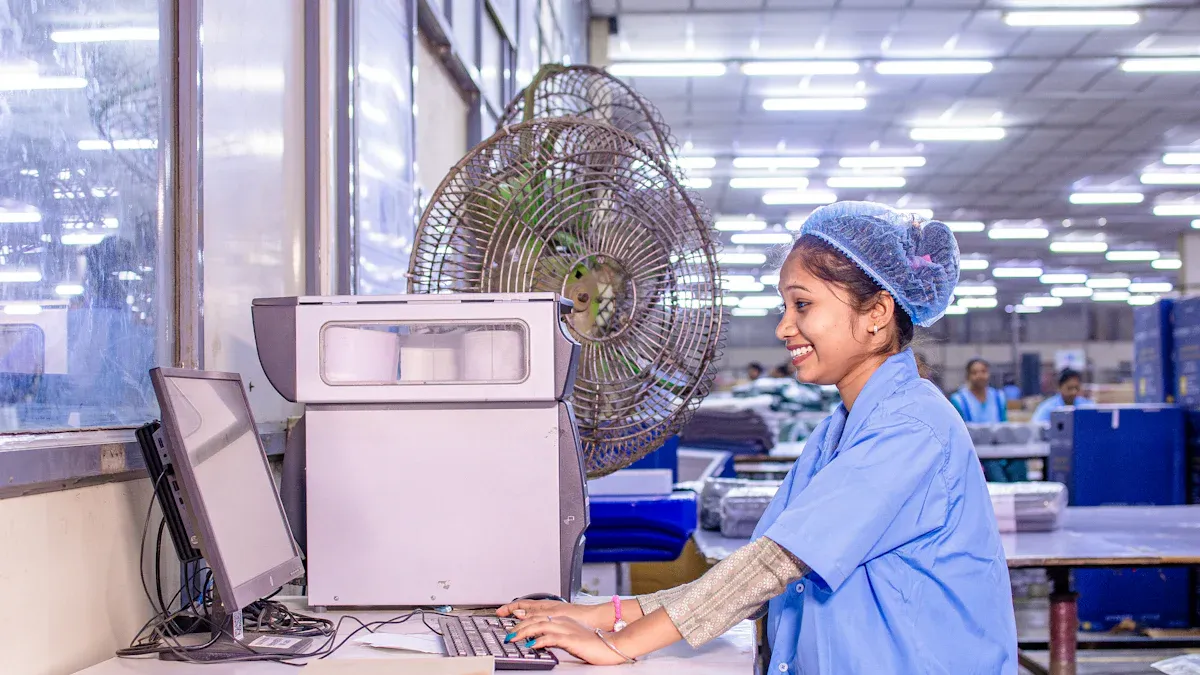
Factories use machines to make many LED Displays quickly. These machines pick up LED chips and other parts. They put them in the right place fast and with care. For small jobs or new designs, people might place parts by hand. Workers use tweezers and look through magnifiers to do this. Hand work lets you fix mistakes easily, but it takes longer.
Tip: Using machines helps you make lots of screens fast and with fewer mistakes. Hand work is good for trying new ideas or fixing problems right away.
After placing all the parts, you need to attach them tightly. This is done with reflow soldering. The board goes into a special oven. The oven melts the solder paste. This sticks the parts to the board.
You must watch the temperature very closely. The oven heats the board in steps. First, it warms the board to about 150°C to 170°C. This step gets rid of oxides and starts the flux. Next, the oven gets hotter, up to 240°C to 250°C. This is when the solder melts and connects everything.
If the temperature is wrong, you can hurt the LED chips or the board. Too much heat can bend the board or make weak joints. Not enough heat means the solder does not melt, so parts do not stick well. Keeping the right temperature stops problems like tombstoning or splatter. It also helps your LED Display last longer and work better.
Note: Always check the oven settings and watch the heat. This step is very important for making strong and good screens.
When you look inside an LED Display, you find several important parts that work together. Each part has a special job to make sure the screen works well and lasts a long time.
l LED Modules: These are the main building blocks. Each module holds many tiny LED lights, driver ICs to control brightness and color, and a PCB board to connect everything.
l Control System: This hardware manages how bright the screen gets and how the images look. It uses sending and receiving cards to move video signals and control the modules.
l Power Supply: This part changes the electricity from your wall into the right kind for the LED modules. It keeps the screen bright and stops flickering.
l Cabinet or Frame: Metal frames, often made from steel or aluminum, hold the modules in place. They let you build big screens by connecting many cabinets together.
l Cabling and Connections: Data and power cables link all the parts. Good cables keep the signals strong and the power steady.
l Front Glass or Acrylic: Some displays use a clear cover to protect the LEDs from dust and damage.
l Black Matrix: This dark area between pixels helps colors look sharper and clearer.
Tip: Choosing strong and reliable components helps your LED Display last longer and perform better.
You build a large LED Display by putting together many modules. Here is how you do it in the factory:
1. Start by mounting arrays of LEDs on PCBs with driver chips and other parts.
2. Place each module into a frame or cabinet made from lightweight metal.
3. Align the modules carefully to keep the spacing even and the image clear.
4. Secure the modules using screws, clips, or locks.
5. Connect the modules with data and power cables inside the frame.
6. Calibrate the display to adjust color, brightness, and resolution.
7. Test the whole screen to make sure it works well and meets quality standards.
8. Prepare the display for final installation and connect it to the control system.
You can also find modules with special connectors that snap together. This design lets you build screens of many shapes and sizes. Some modules have waterproof coatings and metal covers to protect them from heat and weather.
Every screen needs tuning so it looks good. Calibration starts by checking color and brightness. Technicians use tools called colorimeters and spectroradiometers. These tools measure the light and brightness in different spots. Software helps change RGB levels, gamma, and contrast. Some factories use machines with sensors built in. These machines help the display stay the same over time.
Here are the usual steps for calibration:
l Set the black level to make blacks look deep.
l Adjust the white point so whites look neutral.
l Set the white level to make the screen bright but not too bright.
l Fine-tune the black point if you can.
l Check all settings and adjust again if needed.
l Use special software and hardware for the last step.
Sometimes, the screen is split into zones for calibration. Each zone gets fixed for color and brightness. Some new systems use AI to check and fix the screen as it runs. Doing calibration often keeps colors right as the screen gets older.
Tip: Use good calibration tools and do this every few months. This keeps your screen looking great.
Every screen is checked before leaving the factory. Quality checks follow rules like IEC 60598, UL, CE, and ENERGY STAR. Inspectors look at how the screen looks, its size, and if it is safe. They test color, brightness, and power use. They also check for signal problems and see if the screen works in hot or cold places.
Common problems are:
l Signal or clock latch failures
l Bad soldering that causes lines or columns to fail
l Power supply issues that make dark spots
l Missing colors or dead LEDs
l Communication errors from bad control cards or cables
Inspectors use special cameras to find these problems. They measure how bright and even the screen is. If they find a problem, they fix or change the part before shipping. Careful checks mean you get a screen that works well.
You reach the stage where you turn many modules into a complete screen. This step is called panel integration. You start by checking the place where you will install the display. You look at the wall or structure, measure the area, and make sure it can hold the weight. You plan where to run the power and signal cables.
You have two main ways to build the screen. You can use cabinets that already have modules inside. These cabinets make the job faster and give you a strong, flat surface. They cost more, but they protect the parts better. You can also build the screen by putting each module onto a frame at the site. This way saves money, but you need more skill and time. Sometimes, the screen may not be as flat.
Here are the main steps you follow to integrate the panels:
l Survey the site and check the flatness, size, and strength of the area.
l Plan and lay out the cables for power and signals.
l Build the steel frame or mounting structure. Make sure it is stable and lines up perfectly.
l Install the cabinets or modules onto the frame. Secure them tightly so the screen looks smooth.
l Connect all the power and signal cables. Check that every connection is safe and tight.
l Calibrate the display. Adjust the brightness, color, and contrast so the image looks great.
l Do a final check. Make sure every part is secure and easy to reach for future repairs.
Tip: Careful alignment and strong connections help your screen look seamless and last longer.
Before you finish, you add protective coatings to the panels. These coatings keep out water, dust, and UV rays. For example, you might use a ceramic coating like NanoSlic NS 605. This coating makes the surface water and oil resistant. It also stops scratches and keeps the LEDs safe from harsh weather. You can spray, dip, or wipe on the coating. It dries quickly and does not change how the screen looks.
You can also use other coatings, like SOLARBLOC or SOLARTHRU. These coatings block UV light, stop moisture, and keep the screen from turning yellow. Some coatings come in colors to match the display’s look. These treatments help your LED Display last longer, even outdoors or in tough places.
Coating Name | Key Features | Protection Provided |
NanoSlic NS 605 | Ceramic, hydrophobic, abrasion resistant | Waterproof, oil-proof, scratch resistant |
SOLARBLOC SC7050-UVB | UV blocking, moisture resistant | Stops UV damage, keeps screen clear |
SOLARTHRU SC7050 | Transparent, moisture barrier | Blocks water, keeps electronics safe |
Colored Variants | UV and heat resistant, color options | Protects in marine or coastal environments |
Note: Protective coatings and anti-paint treatments are key for displays used outside or in places with lots of dust and sun.
Once you finish the assembly, you need to pack the display for shipping. Good packaging keeps the screen safe from bumps, drops, and weather during transport. You use strong but light materials like cardboard, foam inserts, and bubble wrap. These materials stop the screen from moving inside the box and protect it from shocks.
You pick the right size box for each display. If the box is too big, the screen can slide and get damaged. If the box is too small, it can press on the screen and cause cracks. For fragile parts, you add extra foam or special inserts. This costs more, but it saves money by stopping damage.
You might use advanced packaging methods like COB (Chip on Board) or MIP (Micro LED in Package). These methods cover the LED chips with epoxy resin or special materials. This makes the screen waterproof, dust-proof, and anti-static. It also makes the display lighter and easier to handle.
Here are some best practices for packaging and shipping:
l Use foam inserts and bubble wrap to cushion the display.
l Seal the box tightly to keep out dust and moisture.
l Train workers to pack each screen the right way.
l Choose shipping companies that know how to handle fragile electronics.
l Track each shipment and keep in touch with the customer.
Callout: Careful packaging and smart shipping choices help your display arrive safely and work perfectly when you set it up.
Proper packaging and shipping protect your investment. They make sure your LED Display reaches its new home in top shape, ready to shine.
New display technology is changing how screens look and work. MicroLED and transparent displays are two big new ideas. MicroLED uses very small LEDs for each pixel. These LEDs make their own light, so no backlight is needed. This makes screens thinner and brighter. Pictures look sharper and blacks look deeper. MicroLED screens can have very small pixel pitches, like P0.4. This means you see more detail, even when you are close. Some screens can even show 8K or 12K images with better HDR.
Transparent displays use special designs with spaces or hollow strips. You can see through the screen and still see pictures. These are used in shop windows, smart buildings, and art spaces. Making transparent screens is easier and costs less than making MicroLED screens. But MicroLED transparent screens need very careful tools and control. This makes them cost more and harder to make in large amounts.
Here are some important new ideas:
l Mini/Micro LED small-pitch lets you see more detail
l Flip-chip LED helps make better blacks and saves power
l COB and GOB packaging makes screens stronger and last longer
l Transparent designs help save energy and look creative
Tip: MicroLED and transparent displays need special factories, but they give you better pictures and new ways to use screens.
You want your screen to last long and look good. Factories now use better checks at every step. Skilled workers and smart machines watch the whole process. They check from the start to the end. Automated SMT lines put parts in the right place. Central labs test products and check designs. They make sure every screen follows strict rules.
Factories run aging tests in special rooms. These tests run screens for hours in hard conditions. This finds weak spots and helps screens last longer. Quality checks look at pixels, brightness, and color. Programming and calibration tools set the right brightness and color for each screen.
Many factories get top certifications like CE, UL, and FCC. These show your screen is safe and meets world standards. You can trust that each screen passed hard tests before you get it.
Quality Assurance Step | What It Checks For |
Automated SMT Placement | Checks if parts are in the right place |
Aging Test | Checks if the screen lasts a long time |
Pixel and Brightness Check | Checks if color and brightness are even |
Certification | Checks for safety and world rules |
Note: Good quality checks mean your screen is safe, works well, and is ready for any job.
You now know that every step in the factory matters. Picking the right materials makes your screen strong. Careful assembly helps the display work well for years. Quality checks make sure the screen will last up to 10 years. Testing and smart design stop problems before they start. Strong parts keep the picture clear and bright. When you buy a display, choose one with good quality and support. This way, your screen will work better and last longer.
You can expect most factories to build a standard LED display in 2 to 4 weeks. Custom screens or large orders may take longer. The process includes material checks, assembly, testing, and packaging.
You get longer life from your display by choosing high-quality materials and using protective coatings. Regular cleaning and proper installation also help. Most displays last 5 to 10 years with good care.
Yes, you can replace or repair a broken module. Most screens use modular designs. You remove the damaged part and install a new one. This keeps your display working without replacing the whole screen.
You can use many LED displays outdoors. Factories add waterproof coatings and strong frames. These features protect your screen from rain, dust, and sunlight. Always check the product rating before installing outside.
Please leave a message, we will get in touch with you as soon as possible!


2nd Floor, Building A3, Southern Pearl Technology Park, Yingtai Road, Longhua District, Shenzhen, Guangdong


